Summary
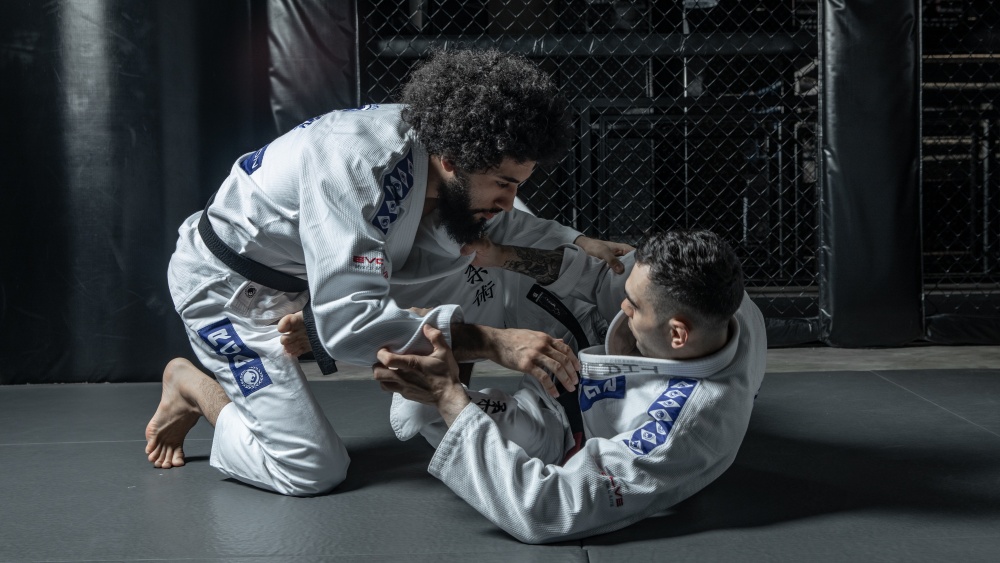
Brazilian Jiu-Jitsu (BJJ) is a grappling-based martial art and a form of self-defense originating from Brazil that emphasizes fighting on all planes of combat once you hit the mats. Also known as “the gentle art”, BJJ has exploded in popularity in recent years and has now become more accessible than ever. The sport is one of the best workouts you can do as it offers a variety of benefits, such as weight loss, improved confidence, problem-solving skills, and discipline.
In this complete beginner’s guide to BJJ, you’ll learn all about how you can easily start to thrive on the BJJ mats – even if you’ve never worn a Gi in your life – and how you can get start enjoying one of the world’s most exciting and effective martial arts disciplines. From the various guards to the submissions found in the sport, allow us to take you on a journey through everything you need to know to get you up and running.
Key Takeaways
- Brazilian Jiu-Jitsu focuses on grappling, positional control, and submissions rather than striking. Practitioners learn how to control opponents on the ground and finish fights using techniques such as chokes and joint locks.
- One of the core principles of BJJ is using leverage and technique instead of strength. This allows smaller individuals to defend themselves effectively against larger opponents.
- Beginners often start by learning fundamental positions such as guard, mount, and side control. Understanding these positions is essential before progressing to more advanced techniques.
- Consistent training helps students improve both physically and mentally. BJJ develops endurance, problem solving skills, and discipline through regular practice and live training.
Chapter 1: Hierarchy of Positions (A Guide to BJJ Positions)
Jiu-Jitsu is unique because, unlike other grappling styles, you place equal importance on both top and bottom positions. Most of the time, a sparring session in BJJ starts with one grappler playing their top game while the other plays guard. This article will guide you to the hierarchy of positions in Brazilian Jiu-Jitsu.
The 6 Major Positions In BJJ
The golden rule of grappling is this – be the guy on top. When on top, you must stay on top. When on the bottom, have a guard that the opponent cannot pass. Because of the rewarding nature of the guard, the first rule is often forgotten. While the top position is the ideal position to be in, this does not make the guard any less intriguing. In fact, in sport BJJ, pulling guard is a common tactic grapplers use even at the highest level.
Passing the guard opens up opportunities to work on pins and back attacks. Pins are a crucial part of grappling as it allows you to restrict movement and stay safe. Taking the back is another premier position and is most preferred by grapplers who like to work on strangles. A successful back take means you can control your opponent and capitalize by attacking their neck.
Here are the six major positions in BJJ.
1) Back Mount
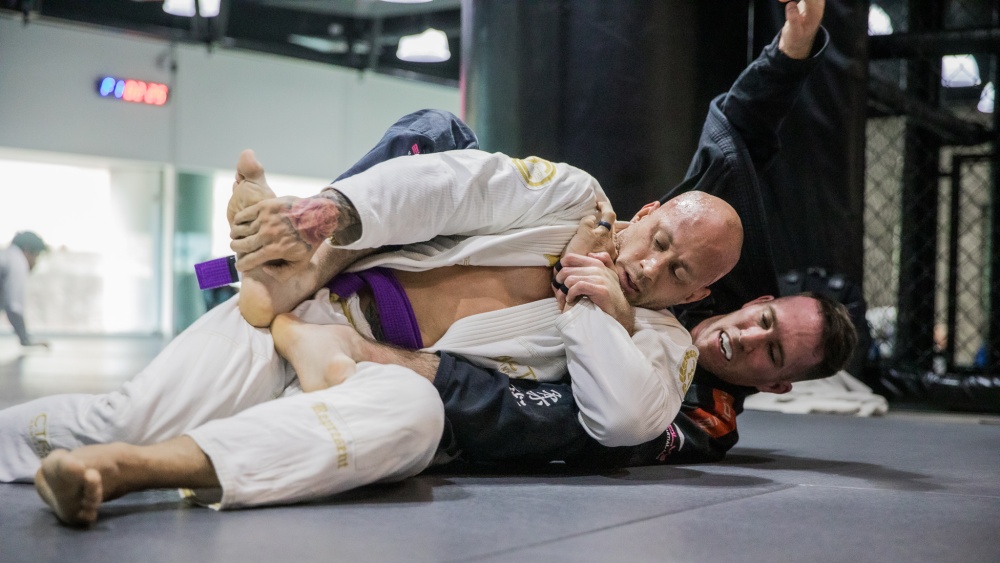
The back mount is the most dominant position in BJJ. It is a position where you are behind the opponent with both legs wrapped around their body (body triangle) or placed near the hip (hooks) to keep them in place. Your hands are used to control theirs, maintain a chest-to-back connection (seatbelt grip), and apply submissions. This position is the most dominant in grappling because the opponent cannot see your attacks as you are behind them.
2) Full Mount
The mount is one of the most prevalent grappling positions and arguably the strongest when strikes are allowed. It is a position where you lay on top of the opponent and use your legs to limit their torso and hip movement. Your hands control the opponent’s movements should they try to escape.
3) Knee On Belly
The knee on belly is a crushing position usually used by higher belts to pin down spazzy training partners. It is a pin where you drive your knee against the opponent’s torso, generally near the solar plexus or chest area, while your other leg bases on the mat. It offers the same advantages as the mount, albeit a bit unstable, especially against large opponents.
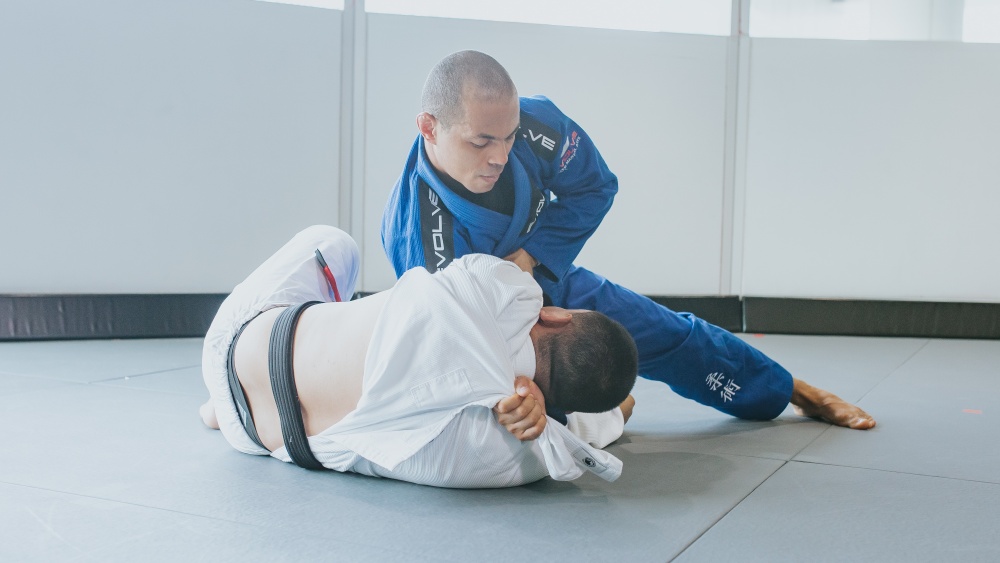
4) Side Control
Bigger and stronger grapplers tend to gravitate to the side control pin, and with good reason – it is a very challenging position to escape from. It is typically the first position you want to achieve after passing the guard. Side control is where you lay perpendicular to your opponent and maintain a chest-to-chest connection. Your legs are used to block their hip to prevent them from escaping. It is the most sought-after position for stability and is extensively utilized before transitioning to other pins.
5) Turtle
The turtle is a defensive position typically used after a failed takedown. It is also a common position to go to when working your way up from inferior positions like bottom side control. It is called the turtle position because you assume a low and defensive stance, similar to how a turtle reacts when it feels threatened.
Keep your neck, arms, and head tight to your body to prevent the opponent from applying submissions or turning you over. Combining the turtle with movements like the granby roll and sit-out is essential to keep yourself as dynamic as possible.
The Top Position
The top position is where a grappler stays on top of their opponent. In passing situations, the top player is the one looking to advance by passing the guard. Inside the guard, the top player is the one trapped inside the opponent’s leg configuration. After passing the guard, the next objective of the top player is to move to pins like side control, and advance from there.
From the stand up, grapplers may achieve the top position if they take the opponent down successfully. After the takedown, the next initiative of the top player is to secure a dominant position. A successful takedown will typically surprise the opponent. This gives you a few seconds to quickly pass their guard and go directly to a pin.
When you are the top player, the typical goal is to first go to side control and pressure the opponent from there. It is the first dominant position you should look for if you have successfully passed the guard before transitioning to other pins like the knee on belly, mount, or back mount (if the opponent turns to their back).
Your goal in side control is to pin the opponent’s upper body as you block their hips. Doing so prevents them from framing or shrimping, as they can use it to create space and escape. After securing the position, the most common submissions you can apply are the kimura, Americana, armbar, and different collar chokes in the gi.
The mount is the next pin grapplers usually transition to from side control. In mount, your goal is to isolate the opponent’s head and arm so you can apply different submissions like the mounted and arm triangle, armbar, Americana, kimura, and variations of collar chokes.
To achieve this, you must move up the opponent’s hip line to prevent them from reversing the position. Slowly work your way up the opponent’s torso up until you go to high mount, and be ready to post your hands on the mat should the opponent explosively does an upa or bridge escape.
The knee on belly offers almost the same advantages as the mount, though it is less stable. In gi Jiu-Jitsu, pulling the opponent’s collar as you drive your knee to their torso will make this position tighter. The goal in this position is to apply pressure, which drains the opponent’s stamina. Common submissions from knee on belly include the cross-collar choke, armbar, and baseball choke.
The Bottom Position
There are only two ways to achieve bottom position – either you choose to play guard, or your opponent pins you down using positions like the mount, side control, or knee on belly. Let’s talk about the guard first. The guard is where a grappler is below the opponent, freely utilizing both their arms and legs. The most common guards you’ll learn are the closed, half, and open guards.
Each type of guard offers different limb isolation. This gives the bottom (guard) player the advantage of using more limbs at their disposal. There are different ways to utilize the bottom position. The main goal of this position is to close the distance and prevent the top player from passing or controlling you, so you can apply submissions, sweeps, or escape if you feel stuck.
The guard is very rewarding and can be addictive. Using the closed guard as an example, the most common submissions you can do are the omoplata, armbar, and triangle. These submissions complement each other well and are best used in combination. Other submissions from the closed guard include the guillotine, kimura, and cross choke.
Aside from submissions, you can also sweep the opponent from the closed guard using techniques like the scissor, lumberjack, hip bump, and flower sweep.
If you are pinned and can’t reverse the opponent, remember to learn different escapes like the upa to escape the mount, framing and shrimping to create space and escape side control, and shoulder rolls to escape from the turtle position.
Chapter 2: Guards (Closed and Open Guard)
The mastery of the guard is what separates BJJ athletes from grapplers of other fighting styles. Through the years, the evolution of the guard has become a sophisticated science of leverage and technique, using both hands and feet in unique ways. Although some are sport specific, the fundamental guards have proven themselves useful in the highest level of competition, even in environments where strikes are allowed. Today we will explore Brazilian Jiu-Jitsu’s most important contribution to combat sports – the guard.
What Is The Guard In BJJ?
In BJJ, a guard is a position where a grappler has their back facing the ground, defending against an opponent looking to pass. The guard helps the bottom player control the opponent by using their arms and legs to slow down the pacing of the fight.
Some guards are more effective in a sport BJJ setting, while others are better utilized for self-defense or when strikes are allowed. The guard is mainly used as a defensive position but can also be used as a hub for submissions, sweeps, and back attacks. The closed and open guard are two of BJJ’s most highly used variants.
The Closed Guard (Full Guard)
The closed guard or also known as the Full Guard is likely the first type of guard a beginner will learn in BJJ. It manifests the very essence of Jiu-Jitsu: being able to fight off your back while staying relatively safe. It is performed by wrapping your legs around the opponent’s waist to form a barrier. With the help of your arms to control their limbs and break their posture, you can control the distance and prevent the opponent from standing up or moving away.
The closed guard is proven to be very practical when used in the competition scene, particularly in submission grappling and MMA. Commonly used as a defense to neutralize an aggressive opponent, it can also be used for offense. You can apply different sweeps from closed guard to gain top position, as well as submissions to finish the opponent. We cover some of the most applied sweeps and submissions from the closed guard later in the article.
The Open Guard
Generally speaking, an open guard is any type of guard where your feet are not wrapped around the opponent. There are many types of open guards in BJJ. It is performed by initiating contact with the opponent’s foot, ankle, legs, hips, arms, lapel, or sleeves to establish control. This control will help you unbalance the opponent (kuzushi), leading to sweeps or submissions.
Open guards can be done seated or supinated (lying on your back). By combining any of the initial contacts mentioned above, you can establish an effective open guard. Like the closed guard, open guards are used to sweep or for entries to submissions. The exciting thing when playing the open guard is that they can be chained with one another, creating different outcomes. Below are some of the most commonly used open guards in grappling.
1) Butterfly Guard
The butterfly guard is one of the strongest open guards as it can be used to effortlessly lift bigger and heavier opponents. This guard primarily relies on using hooks to elevate and unbalance; it is also an excellent entry to other open guards. Your hands are used to apply grips that will control the opponent’s upper body to pull them closer to you. This is the recommended guard for those who love to play an attacking style of BJJ.
2) Single Leg X Guard
The single leg X guard is one of the open guards you can transition to from the butterfly guard. It is mainly used to sweep and is also a great entry for leg locks. In this open guard, the guard player goes underneath the opponent’s center of gravity, placing one foot on the hip while the other is placed under the glutes as you pinch your legs near the opponent’s knee. This guard applies intense pressure on the opponent’s knee line and leg.
3) De La Riva Guard
The de la Riva guard is one of the more dynamic open guards in Jiu-Jitsu. Originally a gi-specific guard, it has now evolved to the point where competitors also use it in no-gi competitions. It is performed by hooking the opponent’s outside leg while your hand on the same side grabs the ankle. Your other foot is used to push the opponent’s opposite hip as you grab the sleeve. It is commonly used to sweep the opponent and take their back.
Chapter 3: Half Guard
Learning how to play off your back is one of the main focal points when learning Brazilian Jiu-Jitsu. BJJ is a martial art that emphasizes ground fighting, meaning that both top and bottom positions are explored once you hit the ground. To stay effective while on your back means that you have the ability to not only protect yourself from incoming attacks but to have offensive options from there as well.
One of the most fundamental guards you must learn is the half guard. The half guard is a position that is considered an in-between of the closed and open guard. Many champions of yesterday and today use the half guard as part of their overall guard game. Here we’ll study the basics of the half guard and how you can integrate it into your Jiu-Jitsu.
The Half Guard
The half guard, as previously mentioned, is where you are almost in the open guard but not quite. It is generally defined as a position with one foot blocking against the opponent’s leg and one placed outside. The use of frames is a major tool in the half guard as you need to stop the upper body from advancing and the lower body from backing out. This means that your arms should work in harmony with your legs, making sure you block any space that the opponent can capitalize.
Half Guard Variants
Think of the half guard not as a specific guard but as a general position with variations in between. There are many types of half guards, and the differences basically depend on your body positioning (and grips) in relation to your opponent’s. It is an intelligent approach to learn at least two of these guards so that you can stay unpredictable as much as possible. Here are some of the common ones you should consider studying.
Standard Half Guard
This is the vanilla version of the half guard and is most likely the one you’ll learn first. The main characteristic of the standard half guard is that you stay on a hip while you block the opponent’s same side leg with your own as you frame against their shoulder and far side arm.
The main goal of the standard half guard is to block the opponent’s forward movement and look for opportunities where you can gain inside position using the underhook. Alternatively, you can target the far arm to initiate submissions and sweeps.
Once your closed guard is opened, your body position naturally gives you an easy entry to the half guard. The half guard was initially a position used to stall and was considered a last-ditch effort to prevent the guard pass. Over time, as with all things in BJJ, the half guard evolved in is now a highly dangerous guard that anyone can use.
In this video, John Danaher expertly explains the half guard and its inherent strengths and weaknesses. Distance management and utilizing the proper grips are critical to a successful half guard attack.
Knee Shield And Z Guard
The knee shield and Z guard variants look almost the same as the standard half guard but with the addition of a leg frame. What differentiates the knee shield from the Z guard is the placement of the shield – if you place it near the shoulder, it is typically referred to as the knee shield half guard. If the knee is set against the opponent’s hip, it is called the Z guard. Both are great options and are simple enough to do.
This video by BJJ black belt Gustavo Gasperin breaks down the knee shield and Z guard in their simplest form. Remember to be as dynamic as you can when using these guards. You can, of course, transition between the two positions as they are very similar to each other in structure.
Deep Half Guard
The deep half is a unique case as it looks very different from the other half guards. Instead of blocking an opponent’s leg using your own, you shoot your body directly underneath the opponent’s center of gravity. Going beneath your opponent gives you many sweeping opportunities, as you can manipulate their base easily.
Watch the video above for an in-depth introduction of the deep half guard by Brazilian Jiu-Jitsu World Champions Teco Shinzato from the Evolve Fight Team. Using this technique, along with proper body positioning, will keep you safe from submissions, backtakes, and even strikes.
Lockdown Half Guard
The lockdown is a half guard variant made famous by 10th Planet Jiu-Jitsu founder Eddie Bravo. The lockdown is a great technique as it is unorthodox but packs a lot of firepower. Eddie used the lockdown to great effect when he competed against the legendary Royler Gracie in Metamoris 3.
In this video, 10th Planet black belt Brandon Mccaghren teaches the basics of the lockdown. You may notice that it is absolutely fine to be flat on your back as you enter the position.
The half guard is one of those positions that will stay with you up to the black belt level. It is a powerful, battle-tested guard that leverages your body position to initiate sweeps, backtakes, and submissions. As it doesn’t require unique attributes to be effective, it is a great guard for grapplers who prefer a straightforward and uncompromising style.
Practitioners of all ages have come to appreciate the half guard for decades. We highly recommend exploring the half guard and see how it can significantly enhance your game.
Chapter 4: Side Control
Side control is likely the first dominant position a beginner learns in BJJ. After passing the guard, the next goal is to pin the opponent. You can go to side control and maintain the pin to do this. From there, you can transition to other dominant positions or even apply submissions. The sequence of guard passing, moving, and maintaining dominant positions are some of the key concepts in a solid top game. Here, we will talk about the basics of side control.
What Is Side Control?
Side control, also known as the side mount, is a dominant position in grappling where you lay perpendicular on top of the opponent with the intent of pinning their upper body on the mat. It is a relatively basic (but highly effective) pin because the top player pins the opponent while their lower body can freely move around.
The grappler on top denies the opponent’s ability to use their legs to escape. This allows them to transition to other dominant positions like the knee on belly or mount or apply a submission. This is why side control is a preferred position of bigger and stronger practitioners.
Maintaining chest-to-chest connection while your leg sprawls or kneels on the mat is essential. Sprawling allows you to drop your weight and keep a heavy hip, whereas kneeling allows you to block the opponent’s shoulder and hips. Both are practical ways of utilizing your lower body when using this position. In side control, your arms have three purposes: to pin the opponent’s hip on the mat, apply an underhook, or apply a cross face.
Pinning the opponent’s hip on the mat blocks their hip and prevents it from turning towards you, creating space. An underhook on the opponent’s far arm likewise prevents them from creating space and keeps you tight in the position.
Applying a cross face allows you to put shoulder pressure on the opponent’s chin, making the situation uncomfortable and preventing them from framing. When maintaining side control, keep the opponent’s shoulder and back flat on the mat, use your body weight to pin them down, and use your knee to block their hip and shoulder.
Kesa Gatame
Another way to do side control is by applying a kesa gatame or scarf hold. Unlike the traditional side control, kesa gatame is focused on controlling the opponent’s head and arm while lying on your side. It is done by wrapping your arm around the opponent’s head, controlling their near arm’s tricep, and widely splaying your legs using your near knee to block the opponent’s shoulder. The end position should look like you are isolating the opponent’s head and arm from the rest of their body.
A similar technique called the modified scarf hold is equally valuable. This is where you shoot for an underhook instead of wrapping around the opponent’s head. Some of the submissions you can do in this position are the armbar, arm triangle, Americana, kimura, and chest compression.
Reverse Kesa Gatame
The reverse kesa gatame is another variation of the standard side control. It is where the top player’s upper body faces the opponent’s lower body. Like the kesa gatame, the top player’s legs are splayed while one side of their hip is on the ground. The top player controls the opponent’s movements by holding the far arm as their weight is directly on top of their chest. The reverse kesa gatame is widely used as a pit stop to transition to the full mount. Different submissions can be applied as well. Examples include the wristlock, straight armbar, and kimura.
Submissions From Side Control
After securing the position, there are different ways to attack from side control. As previously said, you can transition to the mount, knee on belly, or north-south. Alternatively, you can apply submissions. Below are some common submissions you can apply from side control.
1) Kimura
Assuming that you are on the right side, after stabilizing side control, use your left arm (the arm that’s applying the cross face) to grab their left arm. Extend your left arm below their elbow and grab your own collar. Post your right hand on the mat near the opponent’s right hip and move to north-south. While in north-south, drop your weight on their hip and your forehead on the floor.
Pin their right arm with your right knee and put pressure on their elbow until the opponent faces the opposite side (right side). Use your right hand, which is posted on the mat, to grab the opponent’s left wrist. Grab your right hand’s wrist (wrist to wrist) with your left hand to do a figure-four. Pass the opponent’s hand to their back, extend your right leg, and change your base to put more pressure.
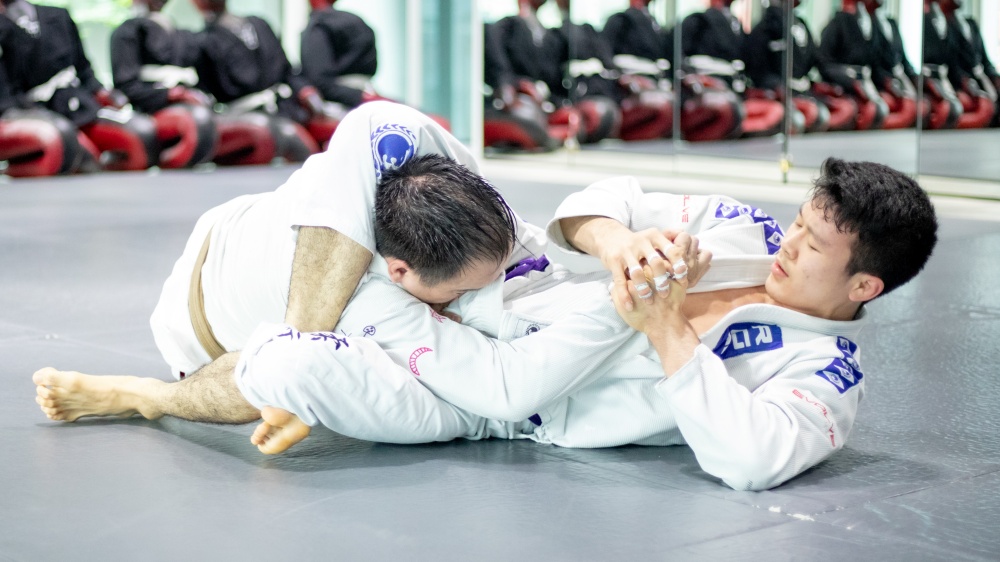
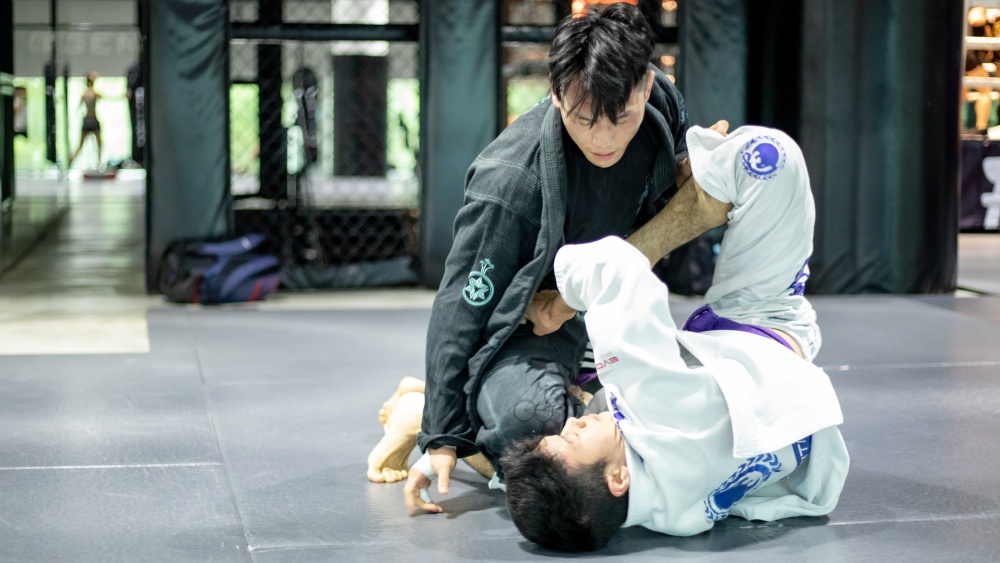
2) Arm Triangle
Arm triangle is a submission you can apply when the opponent frames with their elbow in side control. If you are on the left side, and the opponent frames on your head with their left elbow, push it and trap their left arm and head by placing your head beside their left shoulder as you lock your hands. Move your body to the right by moving over the mount.
3) Far Side Armbar
Starting from right side control, get an underhook on the opponent’s left arm and cup their shoulder. Keep your knees a bit further from their body to create space. Post your left hand on the floor and pull the opponent towards you using your right hand. Lunge step your right foot over their head and place it behind their back while keeping the grip on their left arm. From there, fall back and finish the armbar.
It is vital to have an understanding of all the dominant positions in BJJ. This will allow you to intelligently decide when to attack or stay on the defensive. Side control is one of the many must-know techniques you need to know in your grappling journey.
Chapter 5: Mount
One of the most important aspects of BJJ is the ability to control a fully resisting opponent using a variety of pins. Positional dominance is crucial because it is highly unlikely that you’ll submit someone who is still fully mobile and can still fight with their hands. With the help of gravity and proper positioning, you can effectively approach your opponent with the intent of controlling movement, leading to better chances of submission. Today we’ll explore the king of pins, the full mount.
Pins Defined
A pin is a position that uses your body configuration to immobilize a person’s ability to escape. It is always applied from the top, as you can leverage gravity to your advantage. Pins are an integral part of combat situations and are super useful even without the use of strikes, so much so that it has slowly been accepted in organizations like the police force.
In the context of Jiu-Jitsu, using pins is an intelligent strategy for winning matches. You can gain positional points and wear out your opponent the longer you stay on top. Many champions over the years have used this approach to win high-profile competitions like the IBJJF Worlds and ADCC.
Position Before Submission
You’ve probably heard the saying that position before submission is ideal in grappling. In most cases, this is absolutely true, especially in the early stages of one’s BJJ journey.
Pinning someone down can mitigate the risk of reversals and counterattacks. Getting to a position like the mount can totally change the complexion of a match, as the bottom player is undoubtedly losing. Add the threat of submissions (or strikes in MMA), and you have a great recipe for winning many matches.
Transitions To Mount
As discussed in previous blogs, once you pass the guard, your initial goal is to establish side control. Once there, you have two basic options: keep the position or transition to more dominant pins like the mount. Since our focus now is all about the mount, let’s discuss a couple of basic ways to get there.
1) Mount Transition From Side Control
In this video, Brazilian Jiu-Jitsu World Champion Teco Shinzato demonstrates a simple transition to get the mount position. Starting from side control, ensure that you have good control over your opponent by using the cross-face. It is always wise to keep your current position as tight as possible before moving to another.
From here, lift your far leg and base out as you go to a low knee on belly position. Use your arm to separate the opponent’s far arm from their torso as you move to mount. Doing this makes it harder for your opponent to resist and defend the transition. Lastly, complete the transition and maintain a stable base once on top.
2) Mount Transition From Reverse Kesa Gatame
Another way of getting to the mount is by using reverse kesa gatame or reverse scarf hold.
Nick Albin shares a simple trick to get the mount by threatening the kimura. He says he likes to go to reverse kesa gatame once he establishes side control. You can threaten the kimura by establishing a figure-4 grip. Alternatively, you can transition to the mount if the opponent stays defensive. This little 1-2 combination is a cool sequence and a must-have if you like to play this type of game.
Keeping The Mount
Learning how to maintain the mount is another critical step to maximizing the position. In this video, the legendary Roger Gracie breaks down his approach to his world-class mount. He mentions that most people will likely try only two types of escapes: the upa or bridge escape and pushing the leg to get back to guard.
He expertly gives his tactics on how to not only keep yourself safe but to also keep the bottom player on the defensive the whole time. Roger likes to employ a more suffocating approach to his top game, and with good reason – it is simple, effective, and versatile enough to perform regardless of the ruleset.
Maintaining the mount is a practical strategy in situations where strikes are allowed. Striking from the top position (ground and pound) often leads to technical knockouts and is not very risky, positionally speaking. Always remember that in mixed martial arts, you can finish your opponent by strikes or submissions. You don’t have to compromise your position if you are more comfortable staying on top. We suggest you keep the mount and rain down strikes if you are not confident in your bottom game.
Submissions From Mount
Now that we’ve learned how to keep the mount, let’s talk about common attacks you can perform from the position.
Brazilian Jiu-Jitsu World Champion Alex Silva demonstrates five submissions from the mount, namely wristlock and variations of the nearside and farside armbar. Notice that the submissions are all coming from the cross grip. This is a terrific attacking sequence because you don’t have to move that much to transition from one submission to the next.
Learning submission chains like the one above can elevate your understanding of using combinations. This will help you systematize your sequences, thus making your movements more efficient. The secret to rapid improvement is to master how to get to your desired position and use attacking chains that are easy to do relative to your skill level.
The mount is one of the main building blocks of Jiu-Jitsu. Focusing on top positions like the mount and side control is a viable way to build a strong game. It has been used by countless greats in submission grappling and mixed martial arts, as it is an ideal position to mount and offense from.
If you are a beginner, we recommend focusing on the first three videos we shared above, as they focus on concepts, entries, and general maintenance. The submission video can be treated as an add-on and is best learned once you understand the underlying principles of the mount.
Chapter 6: Knee Mount
The knee mount or commonly known as the knee on belly is one of the most dominant positions in BJJ. It is mainly used for controlling unruly training partners and is probably among the most underutilized and underrated positions you can do. Considered by many grapplers as a demoralizing position to be in, the knee mount is powerful enough that holding the position alone can force an opponent to tap. Let’s discuss the basics of the knee mount.
What Is The Knee Mount/Knee On Belly?
The knee mount, also known as the knee on belly or knee ride, is a dominant controlling pin in BJJ. It is like side control where you stay on one side, but you drive your knee on their belly instead of going chest-to-chest. It is a crushing position, especially when applied by heavier and stronger grapplers, as they can use their weight to drive on the opponent’s solar plexus while pulling on their collar, sleeve, or lapel.
As mentioned earlier, the pressure of the knee ride alone is enough to tap an opponent, especially when they’re already tired in the later stages of a match. Holding the position long enough drains the opponent, forcing them to commit mistakes such as sticking their arms out, which attracts submissions like the d’Arce and armbar. It is versatile as it can be used to transition to the mount, north-south, or back to side control. However, note that this position is unstable compared to other dominant pins, especially side control.
The knee mount is a dominance-asserting position. Higher belts usually force this position to pin down spazzy beginners while wearing them out. Although it is a strong technique that anyone can apply, remember that some consider this technique demoralizing, so be careful when using it on absolute newbies. Please watch the video below to learn how to dominate with the knee mount.
How To Dominate With The Knee Mount
Understanding proper weight distribution is essential when going for the knee mount. It is always advantageous to use this pin as it can be used to take the opponent’s back when they turn away or into you. It takes practice to become efficient with the knee mount because it requires positional awareness and balance.
To get to the knee mount from left side control, use your right forearm to block the lower part of the opponent’s hip so you can place your hand to cup their hip. Replace your forearm with your right shin and left leg to base on the mat. Keep your right foot tight on the opponent’s left hip as your shin and knee drive to their belly. In this position, your weight is on your toes and the balls of your feet.
The more weight you give the opponent on the mounted knee, the more they can control your weight. This compromises your balance and stability, allowing them to escape. As the opponent decides to move by shrimping out, this is the time you add more weight on the knee mount and float with their movements while using your right hand to block their hip. As soon as they stop and face you, your feet will still be planted on the mat.
Submissions From Knee Mount
1) Shotgun Armbar
Starting from the left side knee mount, use your left arm to create discomfort by crawling your hand behind their head. Doing this puts stress on the spine and makes it harder for the opponent to move and turn into you, limiting their motion and power. If the opponent pushes your knee with their right hand, you can go for the spinning armbar. If the opponent pushes your right hip, this is the time you apply the shotgun armbar grip.
As the opponent pushes your hip, use your left arm to apply a C grip on their tricep. Pull their left arm up, catch their wrist under your armpit, and tightly pinch your elbow against your rib. The pinching and the C grip immobilizes the opponent’s arm, preventing them from freeing it from the armbar. Shift your knee mount and place your right foot behind their armpit to create a hook. This means that you are moving away from the knee mount by bringing your hips as close to their shoulder as possible while sitting your weight on their chest.
Use your right arm to post on the mat so you can lean towards their leg. Step your left leg over their head and place your foot near their neck. Keep the C grip and your elbow tight to your body. In this position, the armbar should be tight enough to break the arm. Leaning back and driving your hip to their elbow adds more power to the armbar, and falling back to the mat might even snap the arm.
2) Baseball Bat Choke
From the right side knee mount, grab the opponent’s collar using your right hand with a four-finger grip with fingers outside. Use your left hand to grab with the same four-finger grip, but your fingers should be deep inside their left collar to block their carotid artery. Make sure your forearms are kept close beside their neck. To finish, move to north-south to tighten the noose and drop your head to the ground beside their right hip.
3) Americana
From the right side knee mount, use your left arm to grab a cross collar grip. As the opponent touches your left elbow with their right arm, drive your right hand under their tricep and reach for your own arm to finish the Americana. You can make this tighter by dropping your head beside their neck and posting on the mat as you transition to the mount.
The knee mount is an excellent position you can include on your list of go-to positions. It is a great pin in and of itself; it is also handy for transitioning to other positions. Remember that balance is critical in maintaining this position. Drill countless times to familiarize yourself with the proper weight distribution.
Chapter 7: Back Mount
Having someone on your back in grappling is like being prey being hunted by a predator. It is one of the most vulnerable positions to be in, if not the most, especially when you are face down, flattened on the ground. You can’t see the opponent; therefore, it will be hard for you to anticipate their attacks and defend. This article will discuss the most dominant position in grappling: the back mount.
What Is The Back Mount?
The back mount is considered the most dominant position in grappling. It is a position where you are behind the opponent with chest-to-back connection, using your arms and legs to control the opponent’s upper body and hip. As you attack from this position, controlling the opponent’s hands helps hinder their ability to defend. It can be done in different ways. One approach is to use your legs to trap one of their arms, allowing you to use both hands to apply a choke.
Let’s talk about a couple of technical nuances. When a grappler is behind the opponent with both hooks in (or a body triangle with a seatbelt grip), it is generally considered the back mount. Back control is when a grappler restrains the opponent, maintaining control over the hip and, eventually, the back.
It can be from a position like the turtle, where you have substantial back control over the opponent but with no hooks. A grappler can have back control but NOT be in the back mount – but if you are in the back mount position, you inherently have back control.
Path To The Back Mount
There are many ways to get to the back. Some of the most common ones are from the de la Riva guard and mount. Aiming for these positions will give you many opportunities to take the back. Remember that getting there is only half the work; back maintenance is equally crucial.
Enter the de la Riva (DLR) guard with your right hand gripping the opponent’s sleeve while your left holds their ankle. Straighten your right leg to widen their base. Use your left leg to apply the DLR hook all the way to their hip. Switch your left-hand grip from the opponent’s ankle to the other leg. Grab the bottom of their pants to control their leg.
Position your body directly behind the opponent and center yourself as you place both knees behind theirs. From here, grab the opponent’s belt with both hands. Pull the opponent as you use your feet to kick forward. Get both hooks in, sit up, and get the seatbelt grip to secure the back mount.
Submissions From the Back Mount
1) Collar Choke
From the turtle position, secure back control by applying a kimura grip. Roll over your far shoulder, placing your head in the direction of your left arm. Pull the opponent and insert your first hook. Let go of your kimura grip and apply the seatbelt with your overhand below. Insert your second hook (top leg) to secure the back mount. Get a cross collar grip while your other hand (underhook) grabs the other side of the opponent’s collar. Pull and place your forearm on the floor to finish the choke.
2) Triangle Armbar
Starting from the back mount, the opponent will likely fall to the side (your underhook side) so that their shoulder is free to escape. Readjust your hooks and bring your feet together on top of their hip to maintain pressure. Attack the opponent’s neck with your top hand (overhand) to get them to react. As they defend, grab their bottom wrist using your top hand while your bottom hand grabs the wrist of their top hand. Roll your top leg near their top arm to restrict movement.
Bring and turn the opponent to the opposite side and grab your shin with your underhooking hand. Remove your top hook and perform a hip escape. Lock in the triangle and lie down on your right side. Push and crank the opponent’s arm towards your leg to finish the triangle armbar.
Back Retention Drill
Maintaining the back mount requires dominant control over the opponent. One way to do this is to use transitional movements to keep your body glued to your opponent’s back. One such transition is called the chair sit and is a fantastic way to maintain back control. Let’s look at this chair sit drill from ADCC Champion Giancarlo Bodoni.
The drill starts from the back mount with a seatbelt grip. Once the opponent gets their hips out from the overhand side of the seatbelt, you begin to lose your hook on your bottom leg. When this happens, be attentive to their upper body by bringing your head forward beside theirs (ear to ear). Focus on bringing your elbows in as tight as possible to maintain the upper body connection with your chest.
Your other leg can maintain the hook or stay across their body. The key is to focus on upper body control with the seatbelt grip to prevent their back from sliding down. Use your bottom leg’s toes to drive on the mat forward and drive your bottom leg high, right to your overhand’s elbow, while tucking your foot behind their back. Your other leg steps over across their upper body. Fall to a hip and bring the opponent all the way to the opposite side (underhooking side) to finish the back mount.
Continue the drill on the other side. This time, you might notice that the hand placement is slightly different. Your hand is now underneath their arm, and your head is underneath theirs. Keep your head tight beside their head. Use your forearm to move their head up and drive your leg on the mat. Bring your bottom leg’s knee to the floor to get up and tuck it behind the back. Bring your top leg across their body and pull the opponent to the opposite side, bringing them to the starting position.
The back mount is by far the most dominant position in grappling. We recommend that you start incorporating back attacks to make you a more dangerous and complete grappler.
Chapter 8: Turtle
The Turtle Position
The turtle is a position where you curl up with your head tight to your body and on the mat while keeping your arms inside your body with elbows in with knees and feet on the ground. It is called the turtle because you curl your body to a defensive position, like a turtle protecting its body. Most of the time, this position can be seen in Judo and wrestling. Likewise, in Jiu-Jitsu, it is also used to recover from a failed takedown with the attempt to recover back to some form of guard.
There are a couple of differences between playing the turtle in wrestling and Jiu-Jitsu. In wrestling, the offensive player’s goal is to expose the opponent’s back to the floor to flatten them out and get the pin. The opponent’s goal is to not get turned over and to try to stand up and reset.
In Jiu-Jitsu, the top player’s goal is to expose the opponent’s back, which is already achieved when the opponent turtles. Unlike wrestling, Jiu-Jitsu favors taking the back as it is a prime spot to start your offense from. Since the goal of BJJ is to either dominate positionally or finish with a submission, taking the back is a logical approach, as you can get both. Once you take someone’s back, it is just a matter of time before you get a submission.
In wrestling, you cannot finish the opponent and apply strangles from any position. Therefore the turtle is used to defend with the intent to stand up. Many high-level BJJ athletes say that while learning wrestling is always a good idea, it should be slightly modified to accommodate the threat of submissions. As with other sports, your approach should be in accordance with how the game is played rule-wise.
In Jiu-Jitsu, a common scenario is that the opponent places their elbows on the floor and uses their hands to block incoming strangles. If you are the one attacking the turtle position, your goal is to either penetrate their protected neck and arms and attack with submissions. You can also break them down and take the back for more control, leading to submissions.
The turtle is generally used in two ways: open turtle and closed turtle. Closed turtle is when your elbows and knees are locked close. Open turtle is when your elbows and knees are based out wide. It is easier to insert your hooks and a seatbelt grip when the opponent plays an open turtle where their knees are separated, and hands are wide. Although, in the open turtle, it will be difficult for you to unbalance the opponent down to the hip.
In a closed turtle, inserting your seatbelt grip and hooks will be difficult; unbalancing them to one hip is easier. The closed turtle is widely used in BJJ as it prevents the opponent from putting their grips and hooks in to score points. When the opponent does this, your aim is to knock them down to a disadvantageous position to easily anticipate their reactions.
If the opponent falls on their shoulder and tries to face you, you move to pin them on top (side control, mount, or north-south). If they stay on their elbow posting on the mat, you can lock the seatbelt grip and top hook, pull them over (both belly up), and take their back.
When the opponent tries to keep their right knee to their chest and get up in the opposite direction, put your weight on their hip. By doing so, you are forcing them to scissor their legs as they go back to turtle. This gives you the ability to insert your first hook.
Your goal in closed turtle is to knock the opponent down to disadvantageous positions to insert your hook and the seatbelt grip. From there, continue until you apply both hooks and attack.
In an open turtle, your goal is a little different. You can’t knock the opponent down initially to one hip, but you can insert your hands and apply the seatbelt grip to control their upper body, pull them to an disadvantagous position, and start attacking from there.
The main difference between the turtle in wrestling and Jiu-Jitsu should be clear. A wrestler’s approach is to expose the opponent’s back to the floor while the opponent’s goal is to stand up and get away, to not get turned over and pinned on the mat.
In Jiu-Jitsu, your focus is to keep the opponent’s back exposed as you go in and threaten for submissions without having the penalties from exposing your back to the floor. The opponent’s goal is to either stand up and get away or roll to recover the guard. Remember that putting your hands wide on the mat as you look to stand up from the turtle position allows the opponent to apply submissions, unlike in wrestling.
Understanding the reason why you use certain techniques is imperative to improvement. The way you approach the turtle position should be in a way that enhances your chances of survival. Learning the turtle position might look simple enough, but it is actually far from the truth. The turtle is filled with nuance and should be treated as a technical position because it is.
Drill the turtle position from both sides and focus on safety in the first months of your learning. After this, develop a system to help you recover and move to better positions like the guard or even stand back up.
Chapter 9: Basic Joint Lock Submissions
Earlier, we’ve broken down the basic positional hierarchy of Brazilian Jiu-Jitsu. These positions build the foundation from which a grappler initiates their approach to engage an opponent. As one becomes more adept in transitioning from one position to the next, it is time to build a repertoire of submissions to finish the match quickly.
There are hundreds of submissions in BJJ. This means you can build a unique game perfect for your build, athleticism, and disposition. Think of this as your footprint that evolves as the years go by.
Joint locks are a subset of the major submissions you typically see in a BJJ match. These are attacks that target the joints by bending the limbs in compromising ways. Today we’ll share our most recommended joint locks for Jiu-Jitsu.
A Deeper Look At Joint Locks
Joint locks are submissions meant to hyperextend a person’s limbs. A key benefit of learning joint locks is that they are highly versatile and can be used regardless of the ruleset. All forms of grappling (that allow submissions) have some form of joint locks, as attacking an exposed arm is a logical means to dominate an opponent.
You can use joint locks in a variety of ways. Take the kimura for example. The kimura is perhaps one of the most popular joint locks in all of submission grappling. It is a technique that is meant to submit an opponent in an instant. Alternatively, you can use it as a general position from which you can initiate sweeps, backtakes, and transitions. As you become more experienced in Jiu-Jitsu, you’ll notice that most submissions can be used as hubs for other attacks.
Examples Of Joint Locks
Now that we understand the basic definition of joint locks, here are a couple of our top recommendations you should add to your repertoire.
1) Armbar
In this video, John Danaher explains the basics of the armbar from the guard. The armbar is a straight joint lock that hyperextends the joint of the elbow. You can apply the armbar from many positions, one of which is from the closed guard.
He mentions that the key to a successful armbar is to control the head as you move the arm near the centerline. Typically, you can catch beginners with an armbar by just forcing the arm near your torso, but it gets harder and harder as you roll with stronger training partners. Pulling the head down as you move the arm near the hip will make it easier to execute the armbar regardless of how good your opponent is.
John suggests using a top lock to add another layer of control before the break. Using your legs and wrapping near the shoulder restricts movement of the arm, thereby increasing the chances of a successful submission.
2) Kimura
The next joint lock that we’ll discuss is the kimura. The kimura is a variation of a bent joint lock and is highly useful to control and finish fights.
Brazilian Jiu-Jitsu World Champion Teco Shinzato demonstrates the kimura from side control. He reveals this tactics to keep the opponent smashed on bottom side control, using the lapel and using active toes on top.
From here, wrap your arm around the opponent’s near arm. Depending on where the opponent’s arm faces (your left or right side), your can transition to the Americana or force their body sideways for the kimura or armbar. Another option is to move to north-south as you get the kimura grip. This opens up attacking options like the kimura and armbar as well.
3) Americana
The last technique we’ll talk about is the basic Americana from the top position. The Americana is another fundamental submission used by grapplers of all levels. It is similar to the kimura, but the arm is bent in the opposite direction, forming an L shape.
Brazilian Jiu-Jitsu World Champion Teco Shinzato demonstrates the basics of the move in the video above. He starts by first choosing the arm he wants to attack. Assuming you want to attack the opponent’s left arm, use your left to grab the opponent’s wrist and force it to the mat using your weight. Place your elbow next to the opponent’s neck as you slip your other arm under the opponent’s bent arm. Grab your own wrist and move the arm towards their hip as you raise for the finish.
The secret to a successful Americana attack is to always keep the opponent’s arm bent. Once you force it to the mat, ensure that you get a tight grip on the wrist and don’t allow lateral movement as much as possible. The straighter the arm, the lesser the torque on the shoulder, making the submission unsuccessful.
Drill With A Purpose In Mind
These submissions, while simple, are effective once you take the time to master them. Remember that these are just a sample of joint locks you can execute in Jiu-Jitsu. There are still many submissions available, and we will discuss them in future entries. For now, it is best to focus on these variations and work up as you improve.
Drill with the purpose of understanding these submissions because they can serve as the very foundation of your submission game. Start by doing the techniques with little to no resistance and slowly add common counters once you become more confident. It is also a smart idea to learn how to defend against these submissions so that you avoid falling for them in your sparring sessions.
Joint locks are some of the most valuable techniques you can build a game upon. Regardless of your age, size, and level of athleticism, these submissions will serve you well up until the black belt level. We encourage you to try our recommended submissions the next time you train. They are easy enough to do and guaranteed to elevate your grappling to new heights!
Chapter 10: Basic Chokes
Chokes are the most effective submissions you can perform in Jiu-Jitsu. As Helio Gracie said, with chokes, there are no tough guys. While very useful, other submissions such as armlocks are sometimes not enough to stop a violent confrontation. The good thing about chokes is that you can use them to put people to sleep if necessary.
Chokes can be applied in a variety of ways. You can use your limbs, your gi, and even the opponent’s gi/jacket to force them to submit. Here, we will discuss some of BJJ’s most fundamental chokes.
Choke Vs. Strangle
Before we get into some basic chokes, let’s talk about the difference between a choke and a strangle. Many grapplers (especially those trained under John Danaher) use the term strangle to define submissions previously known as chokes. Here’s the technical description of the terms.
From a medical standpoint, choking is when something blocks the airflow in the pharynx or trachea. Strangulation is the outside compression of the neck to disrupt the blood flow to the neck’s carotid arteries. Basically, it all boils down to where the blockage is coming from. Both terms are acceptable to use and should not be a big deal, all things considered.
For purposes of simplicity, we opted to use ‘chokes’ for all submissions listed below.
Five Basic Chokes In Grappling
Chokes can be applied from both dominant and inferior positions. Before attempting a submission, it is best to secure and stabilize the situation using pins like the mount and side control. Below are the basic chokes you can apply with and without the gi.
1) Cross-Collar Choke/Cross Choke
As the name suggests, the cross-collar choke uses the opponent’s gi collar to choke the opponent. It can be applied from the top and bottom positions, making it a highly versatile submission. This technique is perhaps the first gi choke you will learn when training in the gi.
Starting from the top mount, open the opponent’s collar, and get a deep palm-up grip. After establishing your initial grip, place your left hand on the mat as a base while you walk it above their head to the opposite collar. This will prevent the opponent from reversing you over if they bridge. Grab their opposite collar palm-down and drop your head as you tighten to finish the choke.
2) Rear Naked Choke
The rear naked choke is widely used in grappling and MMA. It is easy to perform and has one of the highest finishing rates in the sport. The key with the rear naked choke is the proper use of grip tactics to bypass the opponent’s defending hands. But once the RNC is deep, it is almost impossible to stop.
Starting from the back mount, control the opponent with the seatbelt grip. Slide your top arm to the opponent’s neck with your thumb pointing up to lift their chin. Once your arm is under their neck, grab their shoulder. Press your head beside the opponent’s face. Release your bottom arm and put your elbow beside their shoulder. Initiate the RNC grip by looping your arms against the neck. Use your bottom hand to grab your top arm’s shoulder to squeeze and finish the choke.
3) Guillotine Choke
The guillotine choke can be used offensively and defensively and is useful from almost all positions, provided that you can get a good grip on the head. From the standup, a typical setup is by snapping the opponent’s head down so you can access their head. Once on the ground, this choke is commonly applied from the closed or butterfly guard.
Starting from the collar tie, snap the opponent’s head down. Wrap your left arm around the opponent’s neck. Move your right hand below the opponent’s arm, place your left wrist firmly, and squeeze your elbow. Pull the opponent down and bring them to the ground. Close your guard, bring your elbow towards your hip, and squeeze to finish the choke.
4) Triangle Choke
The triangle choke is a versatile submission that can be applied from all positions. A leg triangle has different uses in grappling. Aside from the choke, a leg triangle can be applied to maintain back control (body triangle), trap an opponent’s leg (commonly known as the 411, inside sankaku, or honeyhole), or trap both legs (leg clamp), a passing/pinning technique Khabib Nurmagomedov is famous for.
A common triangle choke setup is from the standing hip bump sweep. Starting from closed guard, grab the opponent’s sleeve and hide your other arm behind your head. If they stand up to pass your guard, hug the opponent’s leg using the arm behind your head. Bridge over your shoulder and bump your hip against the opponent’s knee to sweep them down. After they fall, your opponent might post their free hand on the ground. When this happens, swing your leg over the opponent’s shoulder. Grab your shin and lock in the choke, and squeeze.
Once you’ve mastered the triangle from the closed guard, you can move on by applying it from different positions. Keep in mind that the flying triangle should only be drilled and executed with supervision.
5) Arm Triangle
The arm triangle choke can be applied from the mount or side control. Recently used in the UFC by MMA fighter Islam Makhachev to win the lightweight title, the arm triangle has three basic variations, namely: front arm triangle (kata gatame), d’Arce choke, and the anaconda choke. Each variation has its own strengths and weaknesses.
To perform the arm triangle from left side control, push the opponent’s left elbow across your face using your right arm, and make sure your left arm is grabbing the opponent’s left shoulder. Apply pressure to the opponent’s upper body by leaning forward diagonally with your head near the mat. Slide your knee to the opposite side of the opponent’s body while pressing your head down on their arm. Place your left knee close to the opponent’s hip to prevent them from passing the guard while your right leg stretches out to create a base. Push your chest against the opponent’s left arm while sliding your right arm under your left hand. Sprawl and walk your legs to the right to finish the submission.
Chapter 11: Common Mistakes/Concepts For Beginners
As a beginner, it is critical that you learn the fundamentals as early as possible so you won’t carry bad habits as you progress in your journey. In this article, we will discuss the common mistakes/concepts beginners should work on.
1) Grip Fighting
Grip fighting is critical in grappling. As John Danaher said, don’t tolerate or ignore grips that prevent you from holding a stance or moving as you want. Never allow the opponent to apply their preferred grips on you. By allowing this, you are letting them control you, which they can use to manage your movements or to set up and impose their game upon you.
2) Sticking Your Arms Out
Always keep your elbows close to your body. The farther your elbow is from your body, the less strength you can use, making it easier for the opponent to control your arms. If the opponent can isolate your arms and keep them away from your body, it will be easier for them to do a takedown in the standup and apply a submission once on the ground.
3) Posture
Posturing up allows you to keep your balance and base strong. It prevents the opponent from quickly dragging and taking you down, as a broken posture will make you vulnerable to takedowns, sweeps, and submissions. An excellent upright posture will make you tight and powerful as soon as you shoot for the takedown. While having a good posture is vital on the mats, also practice doing it outside the mats to boost your confidence and to become aware of your surroundings.
4) Crossing The Feet In Back Mount

More often than not, this is likely one of the first few pieces of advice given to beginners when in back mount. Crossing your ankles when you are behind the opponent makes you vulnerable to leg locks. This is because the ankle on the bottom acts as a fulcrum for the ankle on top. Putting enough pressure on the crossed ankles can inflict enough pain to force you to tap or, worse, get an unnecessary injury. Though this rule can be more or less broken once a grappler is experienced enough, it is best to save for later.
5) Breakfalls
Breakfalls are important and can potentially save your life outside the mats. A breakfall (ukemi in Judo) is performed in grappling to prevent injuries upon landing after getting thrown or taken down. This is crucial, especially when training your standup. Likewise, doing it can save your life if you accidentally slip on a sturdy surface.
6) Not Training Takedowns
Knowing how to fight on the ground is only half the battle if you think about it. It is also essential to learn a couple of takedowns to take the fight to the ground. Learn a takedown or two and work on different setups to land it. Being good at takedowns will improve your guard passing and make you better at maintaining the top position. Guard pulling is only suitable for sport BJJ. Master a takedown so you can become a well-rounded grappler.
7) Focus On The Basics
Focus on the basics first before you explore the different variations of techniques. There is so much to learn in grappling, and comprehending it all at once can be overwhelming. Master the basics, as it is proven to work even in the highest levels of competition. Work on passing the closed guard, and once opened, choose an open guard pass that suits you best. If you are a bigger grappler, pressure passing like the over-under pass will complement your game well.
8) Tapping Is Not A Bad Thing
Training in Jiu-Jitsu (and doing difficult things in general) helps us better know ourselves. If you want to become a competitor, learn how to regulate your ego. Tap when you get caught in a deep submission to prevent injuries, as injuries can prevent you from training. Don’t muscle out of submissions when training; instead, take the opportunity to learn how to escape from submissions using proper technique.
9) Stalling Tn The Collar Tie
A common mistake in the standup is stalling by using the collar tie. Remember to only use the collar tie when trying to be offensive, as applying it without the intent of attacking will leave your lower body open. When trying to defend it, focus on controlling the opponent’s wrist, blocking their biceps and shoulders to prevent them from pushing forward.
10) Holding Your Breath
Slow down and try not to muscle out of pins and submissions. Learn proper breathing like Rickson Gracie’s “percussive breathing”. It is performed by inhaling deeply and exhaling sharply 5-6 times to force the air out of the lungs. Doing the opposite by sharply inhaling followed by a long exhale also does the trick. Understand that grappling is a different type of endurance and cardio, and running long marathons doesn’t translate well.
11) Be Careful Of Squeezing/Cranking Submissions
Remember to be careful when finishing submissions like the arm bar or joint locks, especially if you are bigger and stronger than your training partner. In training, be mindful of your training partners. Switching to another submission or maintaining the dominant position is always a good idea if they are not tapping. Keep the training playful and safe, as we all have different lives outside the mats.
“The man who asks a question is a fool for a minute, the man who does not ask is a fool for life.” ― Confucius
As a beginner, use the opportunity to learn and ask as many questions as possible. Doing so will help you assimilate concepts quicker and limit bad habits from occurring. Take note that you are in the gym to learn about the art and, most of all, to become a better person than you were yesterday.
Chapter 12: Rules/Scoring
While BJJ is amazing in and of itself, its ruleset adds a layer of freedom (and sometimes complexity) that makes it stand out from the rest. The very heart of Jiu-Jitsu you see today focuses on takedowns, control, and submission tactics to restrain and eventually defeat an opponent. These techniques are practical in combat and can help end fights quickly. The ruleset of most BJJ competitions also follows the same philosophy and gives points to positions where you gain a tactical advantage in a match.
There are two ways to win in a BJJ match: winning by points or by submission. Points are awarded once you execute a technique that leads to a dominant position. You can also gain “advantages” for almost locked-in moves. Conversely, you can also get disqualified once you use techniques that are not allowed in a particular ruleset.
Many grappling rulesets are available depending on where you are in the world. For today, let’s talk about the rules and scoring system of the International Brazilian Jiu-Jitsu Federation (IBJJF), the world’s most recognized grappling organization.
IBJJF Scoring System
Takedown – 2 points
A takedown is a technique that aims to take the opponent down, forcing them to land on their back, seated, or sideways. Under the IBJJF ruleset, the attacker should maintain a dominant position for 3 seconds to get points.
Knee On Belly (Knee Ride) – 2 points
The knee on belly is another technique that gives the attacker 2 points. The key to getting the points is to hold the sleeve and belt as you pin the opponent down. You are awarded an advantage if you cannot maintain the position and grip.
Sweep – 2 points
Sweeping is where you reverse an opponent, placing you in a more favorable position. Remember that you only gain points if you initially start from some form of guard. No points are given if you reverse an opponent from a position that’s not recognized as a guard.
Guard Pass – 3 points
A successful guard pass is when the attacker gets past the defender’s legs and moves to pins like side control and north-south. Ensure that you maintain the pin for 3 seconds to earn the points.
Mount And Back Mount – 4 points
The mount and back mount get 4 points each, as they are super dominant pins. The mount is where you sit on top of the opponent’s torso, with your heads in the same direction. To earn points, the one playing the mount should have two knees on the mat (or at least one knee and one foot placed on the mat). The back mount is similar to the mount, but both face the floor. Like with the other pins, you must keep the position for 3 seconds to score.
Back Control – 4 points
The last position where you can get points is back control. Back control is where you trap the opponent’s legs using your own (hooks) while keeping their arms secured. Note that using body triangles does not constitute back control; thus, no points are given.
Technique Restrictions In IBJJF Competitions
There are several banned techniques depending on the rank and competitions you enter. Some examples include slams, twisting locks, bending the fingers backward, and variations of leg attacks.
As of January 2021, brown and black belt adult competitors can now use heel hooks and other reaping techniques in no-gi competitions. Competitors in the masters divisions and lower belts (purple, blue, white) are still prohibited from using these techniques.
Building A Game Around The Ruleset
Understanding how to leverage the rules is a clever way to maximize your success in competition. You might have noticed that many world champions over the years have games that rely on positional strategy, and with good reason. You’ll surely win many matches if you can find ways to score (and not get scored on) on all your best positions.
Notice that scoring a takedown only gives you two points and that the rest of the positions you can score from are all ground-based techniques. With this in mind, we suggest you build a game that can put you in situations where you can score easily.
If you have a good guard game, you can use entries that will give you openings to get to your favorite guards and, from there, work on sweeps and submission attempts. If you have a solid top game, focusing on a high-percentage takedown is critical as you’ll increase the chances of forcing your opponent to play off their back.
From here, you can then work on pressuring them to play bad positions as you get to dominant pins like side control, north-south, and mount. These are just a couple of basic strategies you can use to have a leg up on your competition.
Mindfulness Is Key
Memorize the rules and scoring system as best as you can. Your understanding of these should be ingrained into you so that you can apply them in stressful situations like competitions. You don’t have to always keep score every time you roll with your training partners, but you should at least be mindful if you are getting dominated positionally. Mindfulness is key to building intelligent game plans and is the secret ingredient of championship-level athletes and coaches.
The rules dictate how you play the game. It is not enough to be a good grappler to be successful; you must also study how to use the rules to your advantage.
Chapter 13: Etiquette And Tips For Your First Class
Brazilian Jiu-Jitsu gyms can be intimidating for newcomers, but you will find they are welcoming places if you conduct yourself the right way.
The way you conduct yourself comes down to one thing – respect. All martial arts are built on this value that has run through them for thousands of years. Despite the long history, this is a simple concept. As long as you recognize the rules and appreciate everyone in your class, you can’t go wrong.
In this chapter, we’ve come up with some tips on what to look out for while training at the BJJ gym. Sticking to these guidelines will show the appropriate respect to your coaches and training partners, and will help you fit right in wherever you train.
Turn Up On Time
Make sure you arrive at the gym in time for the start of the class, ready to train.
It would be considered rude or disrespectful for you to turn up late to a job or social engagement, so why should martial arts practice be any different?
Whether you’re training to compete or you’re just a hobbyist, you owe it to your coach, your teammates, and yourself to be punctual.
If you run onto the mats five minutes after the start of class, you’ll disrupt the lesson and will waste everyone’s time while they wait for you to catch up on what you’ve missed.
You’re also likely to miss valuable warm-up time, which could lead to injury.
Some instructors may not even let you join a class if you miss the start. Others might allow you to join in, but not before you pay the price for your lack of punctuality. Want to avoid 50+ burpees? Arrive when you’re supposed to.
The best practice is to turn up a little early, giving you an ample amount of time to stretch, wrap your hands, and even catch up with friends before it’s time to get serious.
Listen To Your Coach
It’s just plain rude to not pay attention to your coach. They are the fountain of all your martial arts knowledge, and they demand your respect.
Most trainers don’t mind having to explain a technique or concept several times – especially if it’s difficult, complex, or unfamiliar – but not if it’s because you didn’t listen to them the first time.
You can chat about what you saw on TV last night after class, not while your instructor tells you what to do or how to do it.
If you’re not focused on what you’re being shown, not only will you make your coach angry, you’ll end up doing something wrong. That could mean you pick up some bad habits that could stay with you for a long time.
You’re forking over your hard-earned cash to learn from your coach, so try to absorb whatever knowledge they share with you.
Treat Your Training Partners How You’d Want To Be Treated
BJJ gyms should create a welcoming environment where anyone can come and learn the gentle art, so help to keep it that way.
In mixed-ability sessions, you might be partnered with someone with less experience, so don’t get frustrated with them if they can’t hold pads for your combinations.
Everyone was a beginner once, so remember what it was like when you started. Try to guide them through the process. Once they get the hang of things, they’ll become a valuable training partner.
If you’re a newbie and pair up with someone who’s far more experienced, try to relax and listen to their advice.
Overall, just be friendly to everyone. It’s not okay to be antisocial or behave inappropriately anywhere. If you do so in the gym and dissuade anyone from coming back, you might be asked to leave too.
Keep It Clean
If you don’t look after your personal hygiene, no one will want to train with you.
Make sure you air out or wash your gi after every session so it’s clean and bacteria-free when you step back onto the mats.
Keep a towel handy in the gym so you can wipe excess sweat away before you cover all your friends. If you have long hair, keep it tied back and out of the way.
Also, wash your gi before every class. Smell your gi when you it off to find out why!
You should also keep your fingernails and toenails trimmed. They can also scratch, or worse. There are also horror stories about serious injuries being caused by untrimmed talons.
Finally, if you have any cuts, make sure they’re covered up before you step on the mats, and dress them immediately if they get exposed.
Tips For Your First Class
If you’ve set foot in a BJJ gym as a newcomer and feel intimidated when you step into a new gym for the first time, you’re not alone. However, there’s no need to worry. You’ll be welcomed as a new member of the martial arts family as soon as you step onto the mat.
While you get your feet wet in your new martial arts family, keep these things in mind to help yourself adjust and adapt.
- Get To Know The Gym And Instructors:
On your first day, turn up a little early to get to know the layout of the gym – where to sign in, where to get changed, and where everything is kept. Also, don’t be afraid to introduce yourself to your instructors – they won’t bite! If you’re nervous, you can explain that it’s your first time, and you can be sure these experienced experts will help you ease into things. - Don’t Be Scared To Ask Questions:
Don’t understand something? Worried you’re not doing something right? Don’t sweat it. Just ask one of the coaches or even one of the other people in the class to help you out. The atmosphere is always supportive and everyone around you knows what it feels like to start out. Everyone was a beginner once. - Give It Your All:
Whether you’ve taken up BJJ to get fit, train towards competing, or just to try something new, make the most of your time on the mats. If you can’t do something right at first, don’t give up! Practice makes perfect, and a good attitude will go a long way with your instructors. - Relax And Have Fun:
While you should try your best in BJJ class, no one expects you to be as well-conditioned as Alex Silva, or as fast as Mikey Musumeci, or as technical as Marcus ‘Buchecha’ Almeida. While you should try your best, make sure you go at your own pace too. It’s best to take your time and stay loose. That will help with your technique and help you to learn. All that should contribute to a great time.
Chapter 14: Choosing A Brazilian Jiu-Jitsu Gym
As the “Gentle Art” grows in popularity the world over, Brazilian Jiu-Jitsu gyms are popping up everywhere.
BJJ practitioners are spoiled for choice when it comes to picking somewhere to train. If you don’t know what to look for, it might be difficult to decide what’s right for you.
Without expert knowledge, you could end up failing to keep up with a group of experts, or struggling to learn ineffective techniques from a con artist at a McDojo.
With our advice you should get everything you need to know about choosing the right place to learn Brazilian Jiu-Jitsu – one that’s welcoming, teaches you the skills and values of martial arts, and will help you reach your goals.
Accessibility
Before we even get started with what makes a good gym, ask yourself whether you can fit the gym’s timetable of classes around the rest of your professional and social life. If you’re new to the sport and beginner’s classes clash with your shifts at work, it may not be the place for you.
Likewise, if you have to take three buses or drive more than an hour to get to and from training, are you prepared to make that trip multiple times a week?
If you’re a dedicated grappler, you can work around these issues, but others may want to go somewhere that’s a bit more convenient.
Even if you are willing to rearrange your schedule or buy that travel pass, make sure you check out the rest of these factors to make sure it’s worth it.
Reputation
Now more than ever, it’s easy to get a good idea about what a gym is like before you even set foot on the mats.
If you see a busy room with a lot of smiling faces, the chances are that you’re onto a winner.
Not convinced? Just ask. A lot of gyms thrive on word of mouth, so talk to people and find out what they think of your prospective training center.
You can also go online to social media or martial arts forums to do some research and discover if your targeted training center is for you.
If its members are known as ‘The Murder Squad’ and have a reputation for taking no prisoners in sparring, you might want to look somewhere else for your introduction to Brazilian Jiu-Jitsu.
Coaches
It’s important to avoid a charlatan and find an accomplished coach you like and respect.
It’s always worth doing your research to find out if the head instructor is infamous for boasting about fake or dubious credentials. These guys are to be avoided.
Finding a trainer with a record of professional fights and title wins is often a good sign, but you’ll never really know how good they are as a teacher until you experience their methods first-hand.
Your ideal coach is passionate about the sport and their students. They’ll also be patient, attentive, and try to divide their time equally among the people they teach.
If you can find someone who welcomes you to the gym for your first session, and then takes you through some of the basics before you start the class, you could be on to a winner.
Training Partners
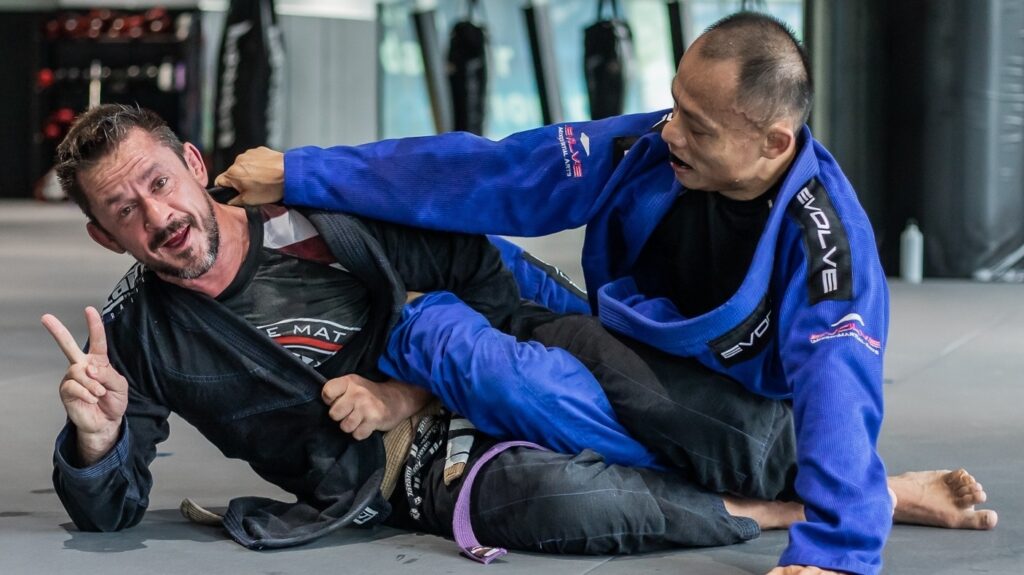
A good coach usually cultivates a gym with a welcoming environment and friendly training partners for you to practice with.
However, you need to consider more than just how friendly your teammates are when you commit to joining a gym.
It would be ideal if you can identify a good mix of skill levels among your new gym’s patrons.
As a beginner, it’s nice to train alongside others who are also starting out. That means you can share your martial arts journey and help each other out along the way.
At the same time, it’s still good to have some higher-level training partners. Training with people who are better than you will help your evolution as a martial artist because they’ll help you out and put you to the test when you’re ready to spar.
It’s also worth considering the size of your teammates. If you’re slight and hover around five feet tall, a gym populated by giants who measure over six feet and tip the scales at 100kg may not be for you.
While it’s not impossible to train with much bigger or smaller teammates, both you and your training partners will need to make big adjustments for pad work and sparring.
Some women may also prefer all-female classes, but this is not always possible at a lot of smaller gyms.
However, that shouldn’t put anyone off. Women’s participation in Brazilian Jiu-Jitsu is growing all the time, In fact, these days many have reaped various benefits of joining a BJJ gym, so mixed classes are common, and most of the men are not half as scary as they look.
Equipment And Facilities

A gym full of brand new equipment is no substitute for quality in other areas.
With that said, it’s a bad sign if the equipment is bursting at the seams and leather is peeling off all over the mats. If the gym owner doesn’t look after that, do you expect them to look after their students? Look for a gym that takes cleanliness and quality seriously.
Your Goals
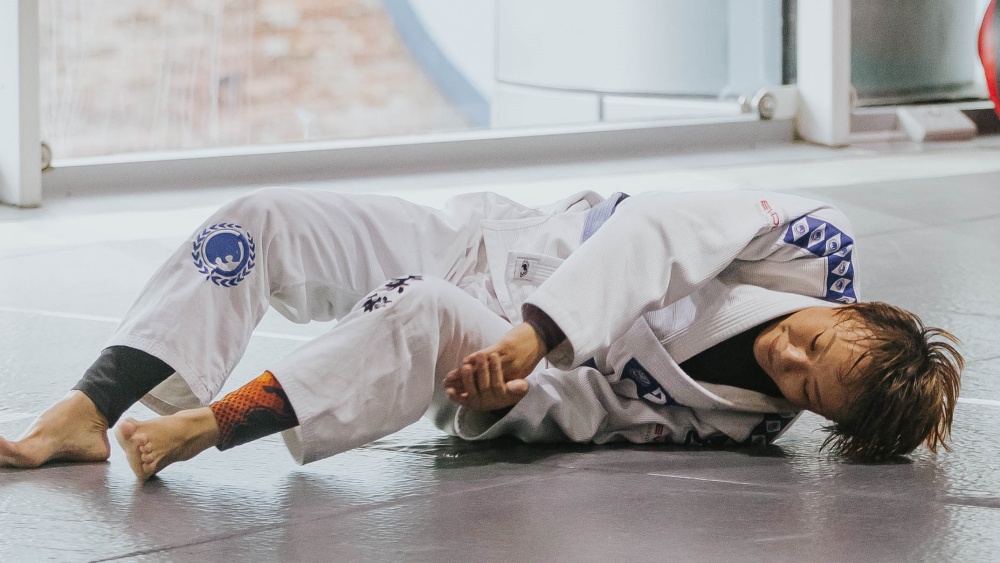
Finally, does the culture at the gym match up to what you want to get out of it?
By now, you’ll probably have established whether it’s a good place for beginners, but what about your plans beyond your first few weeks of training?
If you want to compete, ask whether that will be possible. If your gym is active in interclub competitions, regularly has fighters competing, or even promotes its own events, you’re in the right place.
You might also want to know if there’s an active social element among members. Brazilian Jiu-Jitsu gyms are great places to make friends if you’re new to an area, so ask if there are regular events that everyone gets involved with.
Other FAQ On Brazilian Jiu-Jitsu
Q: Is Brazilian Jiu-Jitsu Difficult For Beginners?
A: Brazilian Jiu-Jitsu can feel complex at first because it involves many techniques and positions. However, beginner classes focus on teaching fundamentals step by step, allowing students to gradually build confidence and understanding.
Q: What Happens In A Typical BJJ Class?
A: A typical BJJ class usually includes a warm up, technique instruction, partner drills, and controlled sparring often called rolling. This structure helps students practice new techniques and apply them in a live training environment.
Q: Do You Need To Be Strong To Start BJJ?
A: No. Brazilian Jiu-Jitsu emphasizes leverage and technique rather than raw strength. Many beginners start with little grappling experience and develop their strength and conditioning over time.
Q: How Long Does It Take To Get Good At Brazilian Jiu-Jitsu?
A: Progress in BJJ varies depending on training frequency and dedication. Most beginners begin to feel comfortable with fundamental positions and movements after several months of consistent training.
Kickstart Your BJJ Journey Today!
We hope that we have answered all your questions in this comprehensive Brazilian Jiu-Jitsu beginner’s guide! If you have yet to join the bandwagon of being a practitioner of the gentle art, we highly encourage you to get started today!
If you are in Singapore and looking for the best Brazilian Jiu-Jitsu gym, consider joining us by signing up for a complimentary trial class now!
Book your complimentary trial class with our World Champions below!
If you have any other questions regarding Evolve MMA and the programs we offer, you can get in touch with our membership executives at the following locations:
Evolve MMA (Far East Square)
26 China Street
Far East Square #01-01
Singapore 049568
Phone: (65) 6536 4525
Evolve MMA (Orchard Central)
181 Orchard Road
#06-01 Orchard Central
Singapore 238896
Phone: (65) 6536 4556
Evolve MMA (KINEX)
11 Tanjong Katong Road
#02-52 KINEX
Singapore 437157
Phone: (65) 6288 2293
Evolve MMA (Clarke Quay Central)
6 Eu Tong Sen Street
#04-18 Clarke Quay Central
Singapore 059817
Phone: (65) 6226 2150
Evolve MMA (Star Vista)
1 Vista Exchange Green
#02-26A The Star Vista
Singapore 138617
Phone: (65) 6539 9590